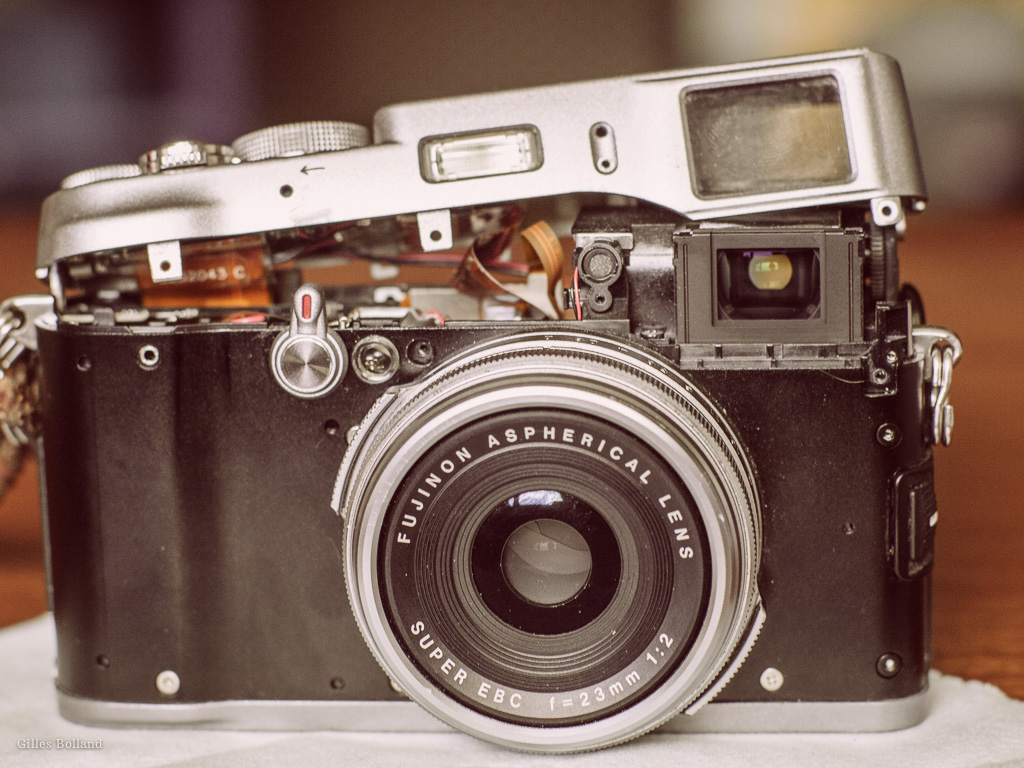
Behind the operation
A few month ago, I accidentally dropped my X100 on the floor. A couple of weeks later, the diopter adjustment control stopped working, but a shake of the camera was enough to put it in the right position so I didn’t bother. A couple of weeks later, my viewfinder curtain started to fail randomly. Since it was getting really annoying, I decided to send the camera to PM2S, the company that take in charge FujiFilm after-sale services in my region.
I had to pay 75€ to get a price quote of 650€. They had to replace the whole lens/sensor/viewfinder module with new parts. They are not competent enough to actually repair stuff: they just replace them with new ones. Since I’m living on a budget, I was stuck with my defective X100.
Last month, after a long road trip, the diopter adjustment locked itself to an extreme correction. It became impossible for me to fix it by shaking the camera like I did before so I had to think about fixing it myself.
This is an illustrated guide that will help you to open the top plate of your FujiFilm X100 camera body, I hope it will help the other people who can’t pay for repair services.
Guide
Tools needed
- PH00 Philips screwdriver,
- T1 TORX screwdriver,
- prehensile thumbs.
Step 1
Skin your lovely camera
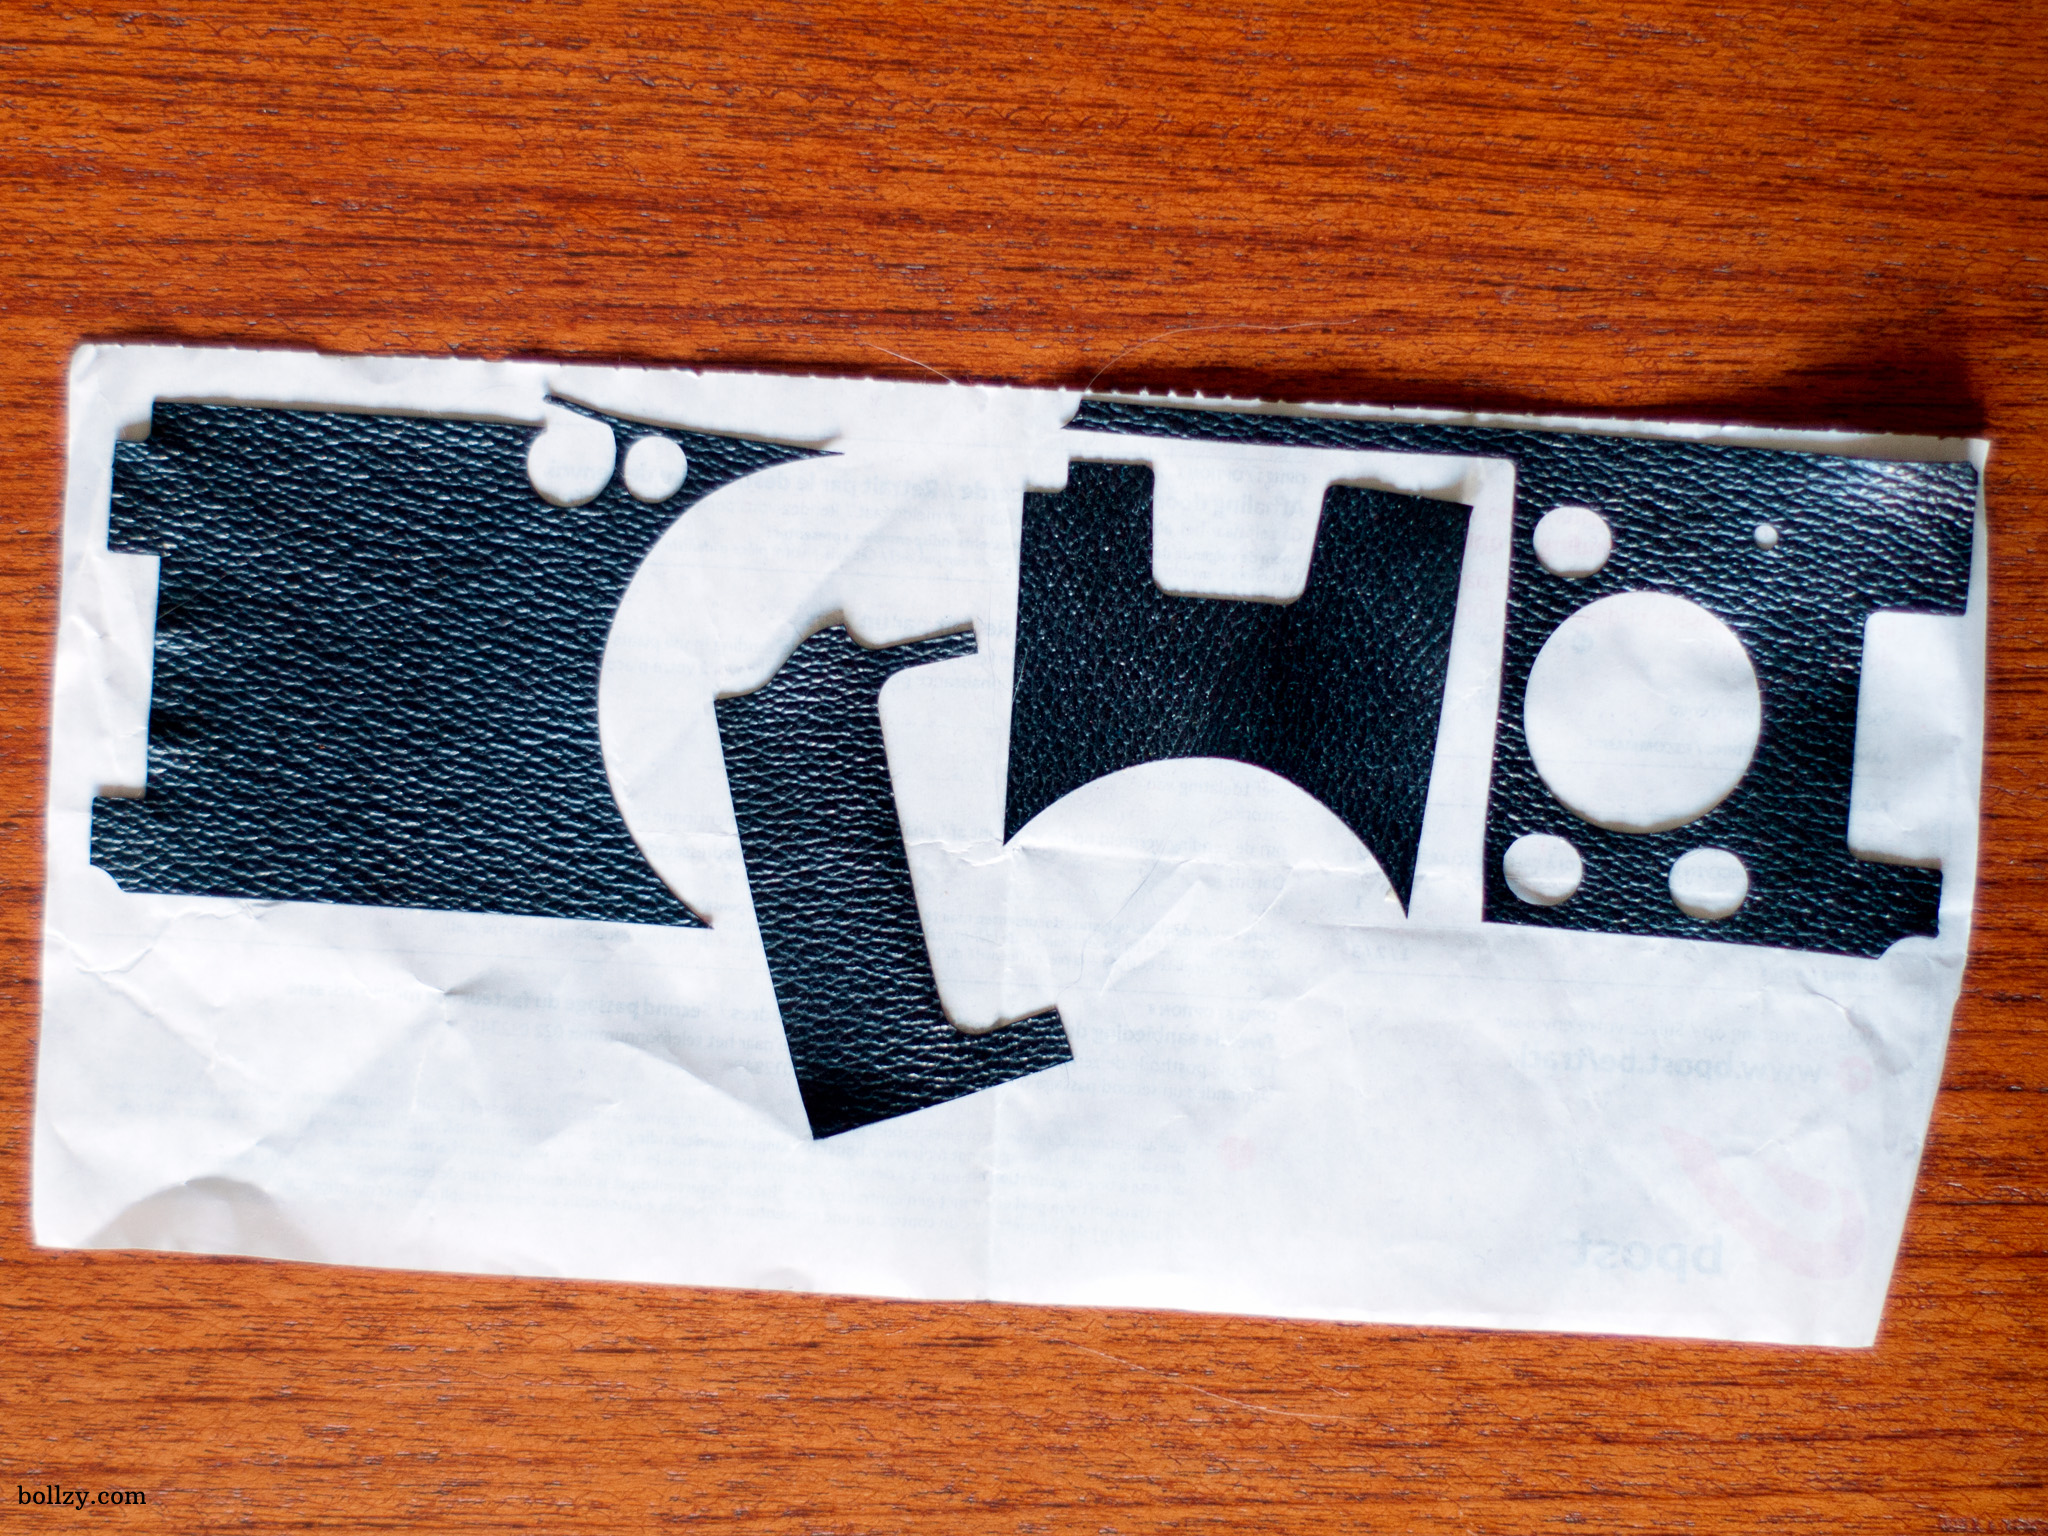
Aki-Asahi Camera Coverings
Step 2
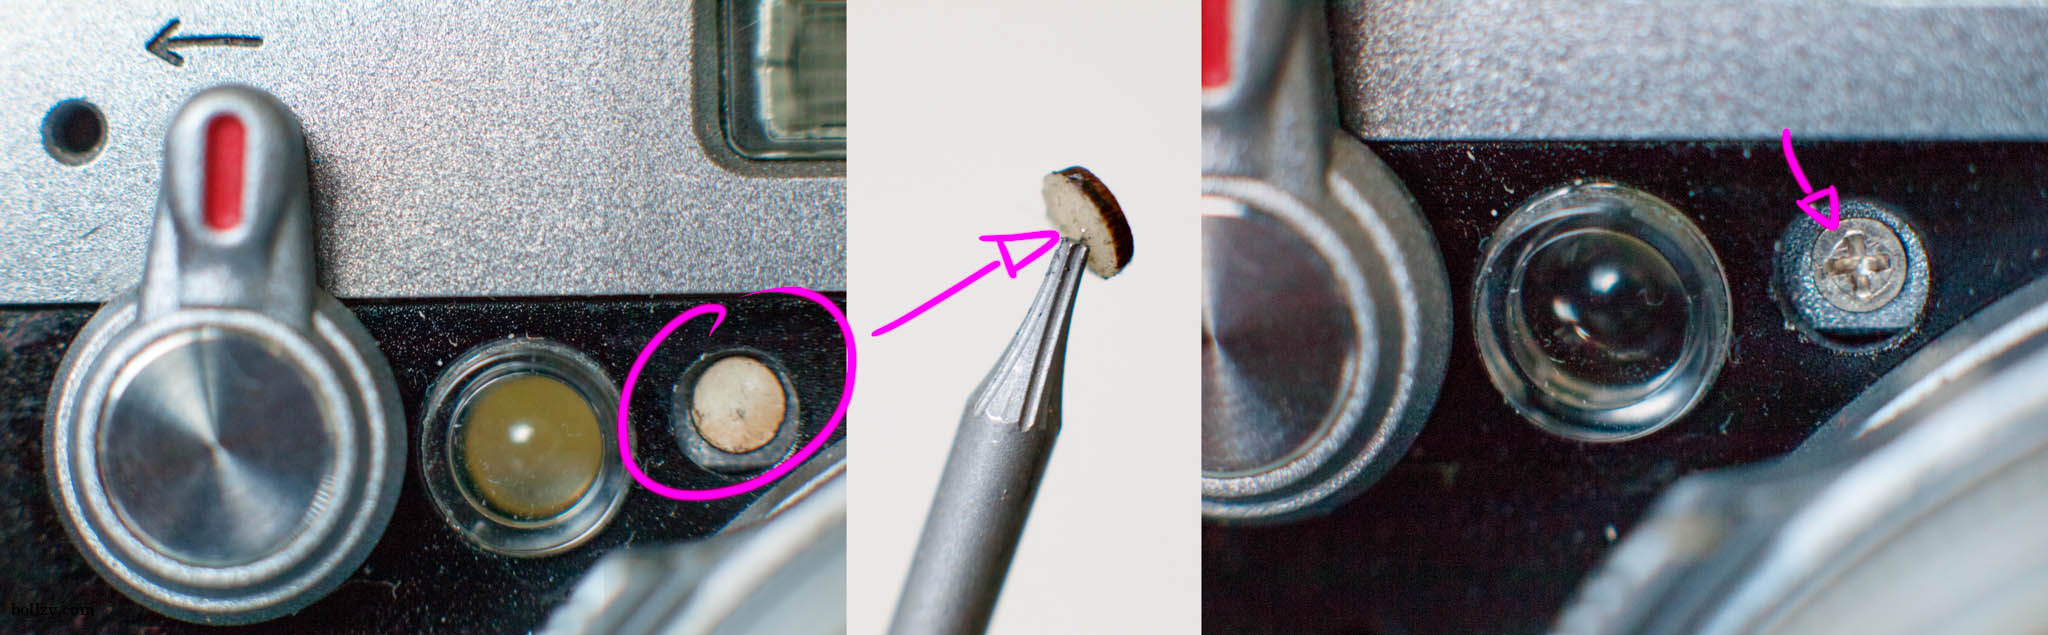
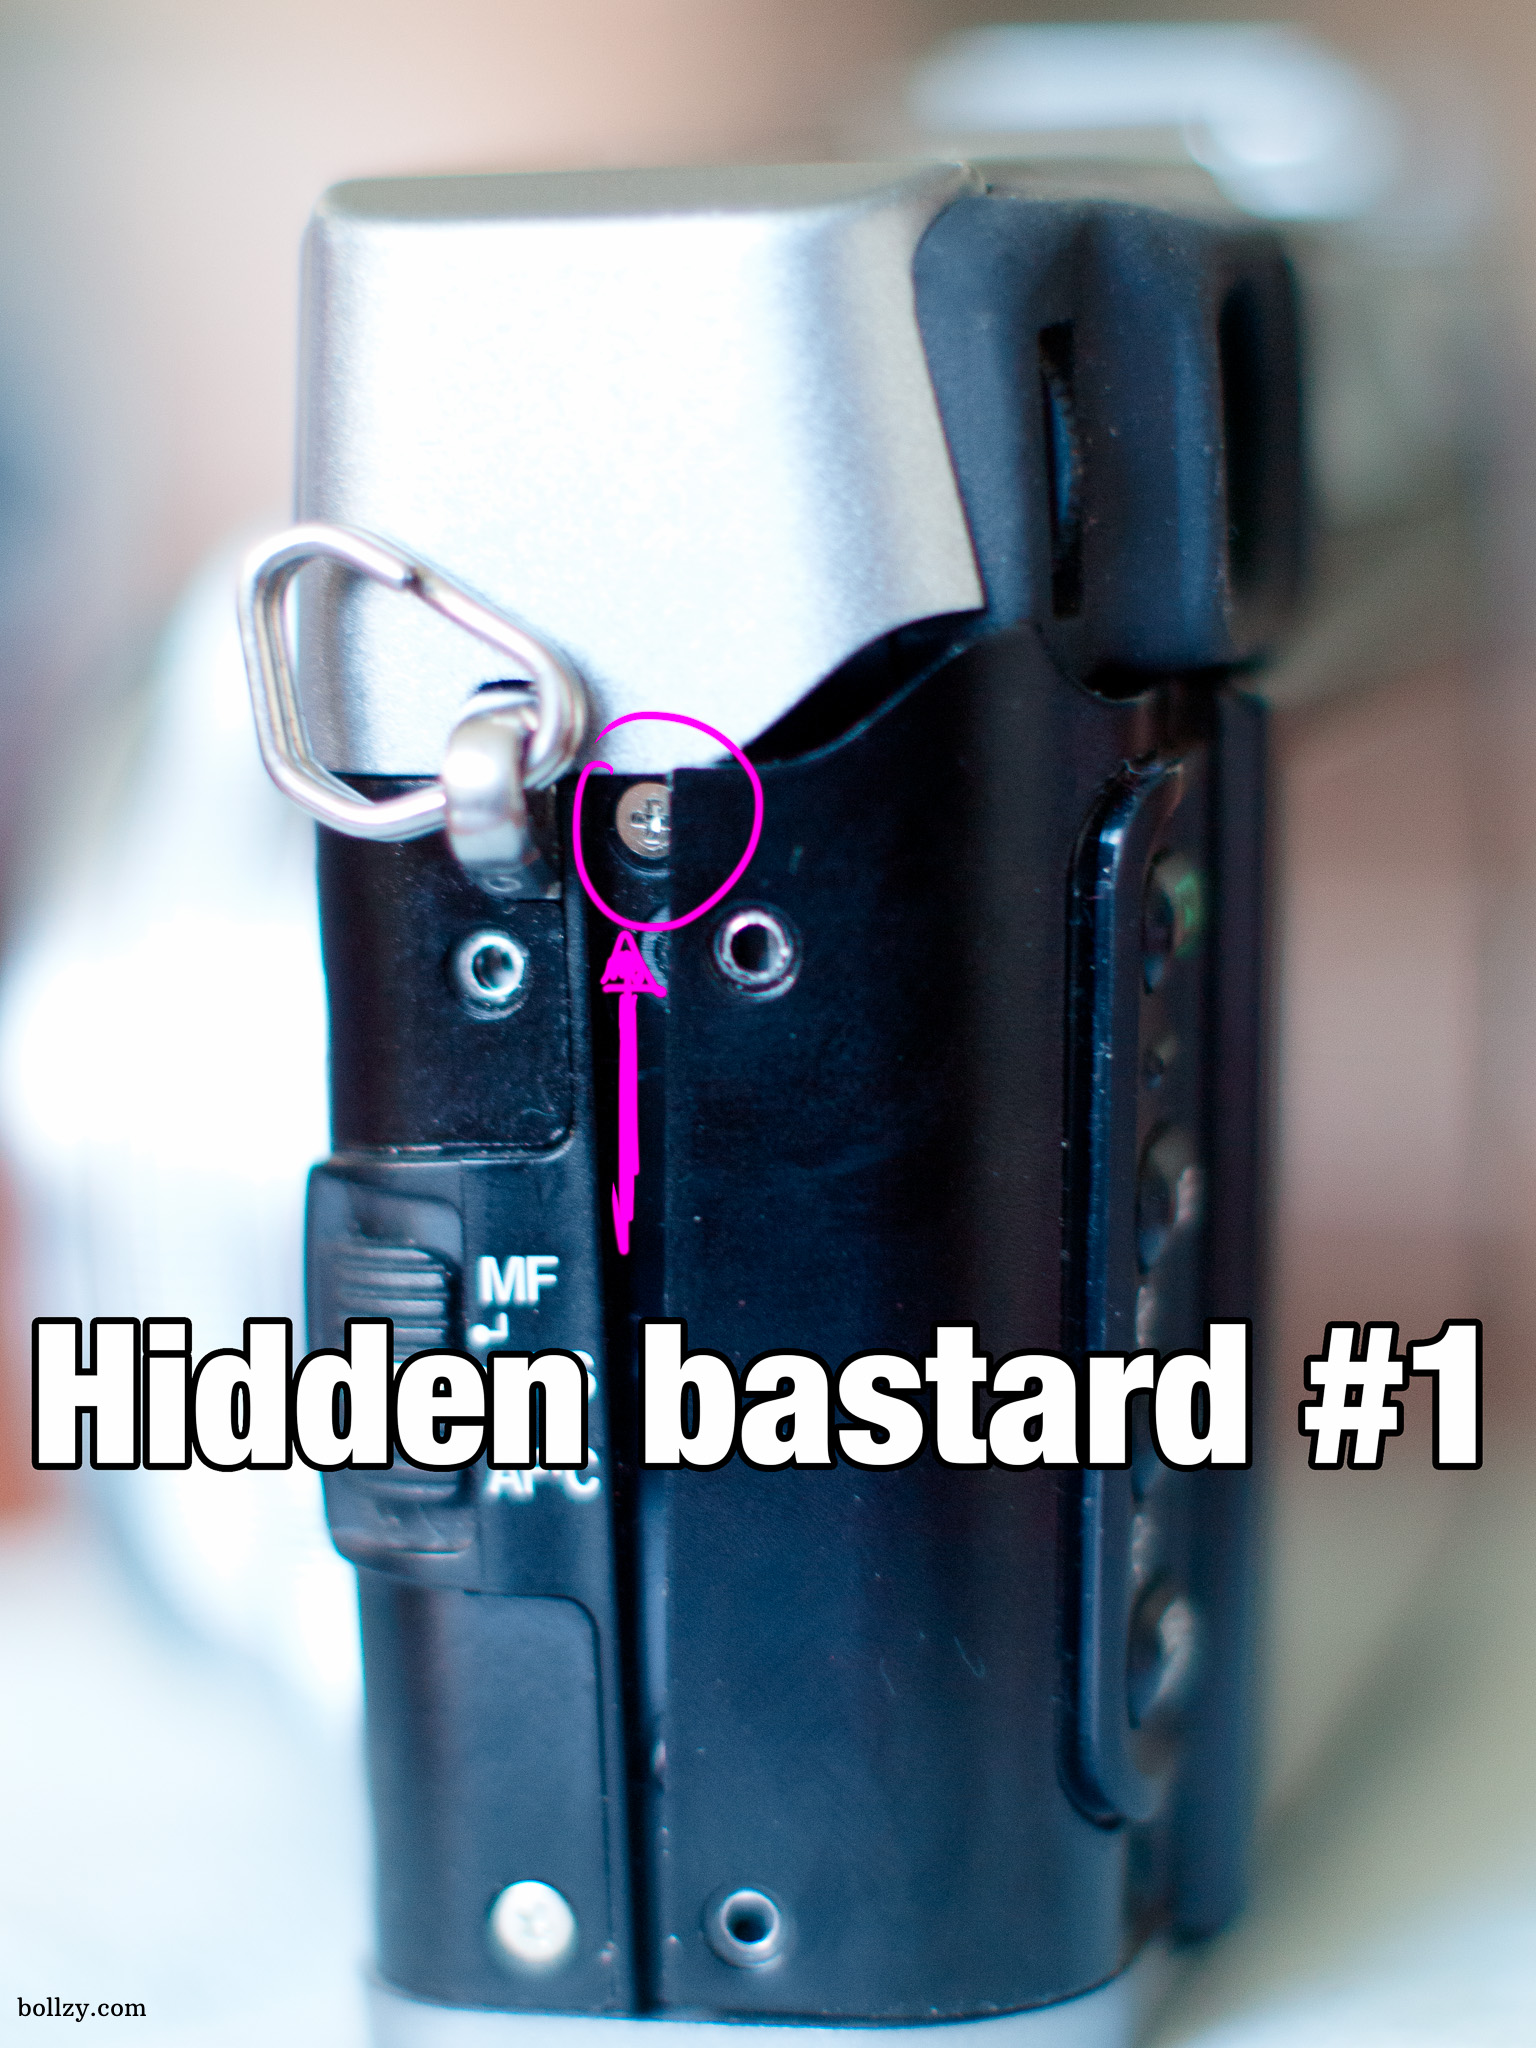
Draw a map for the screws
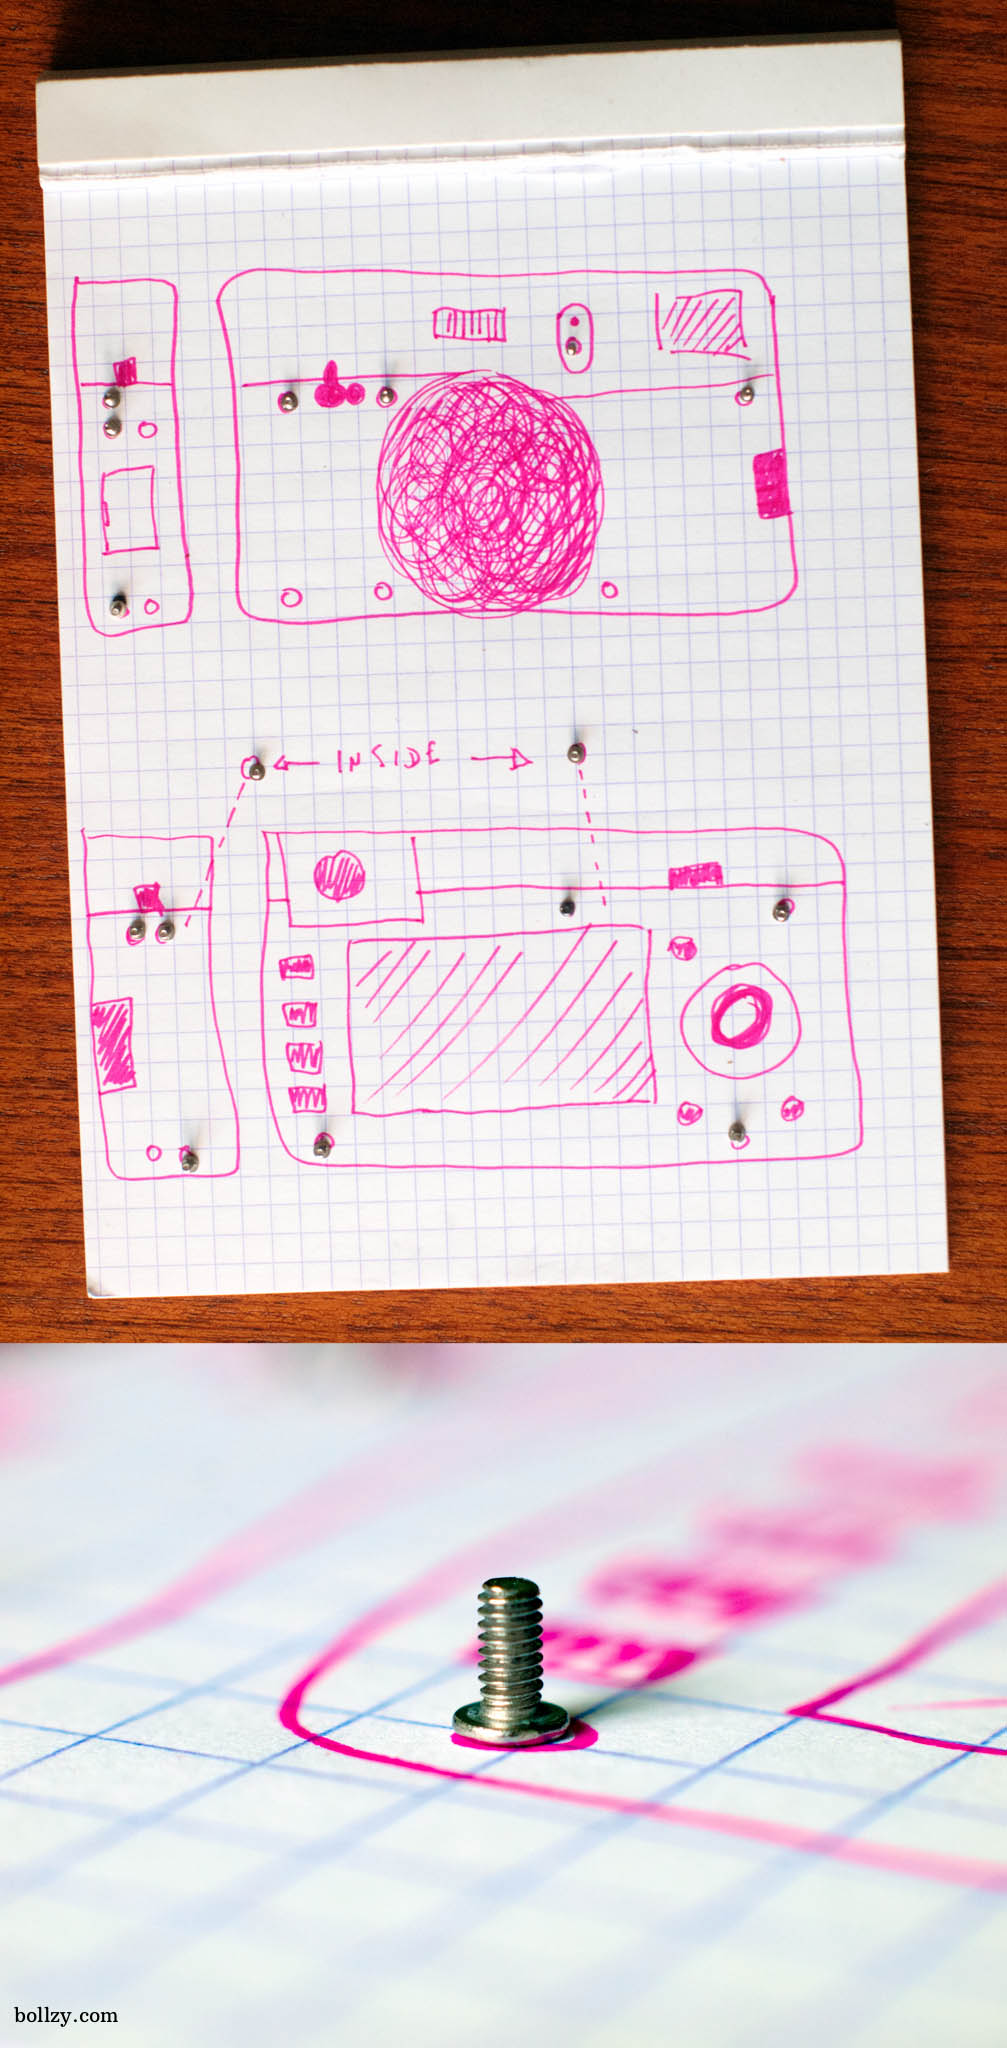
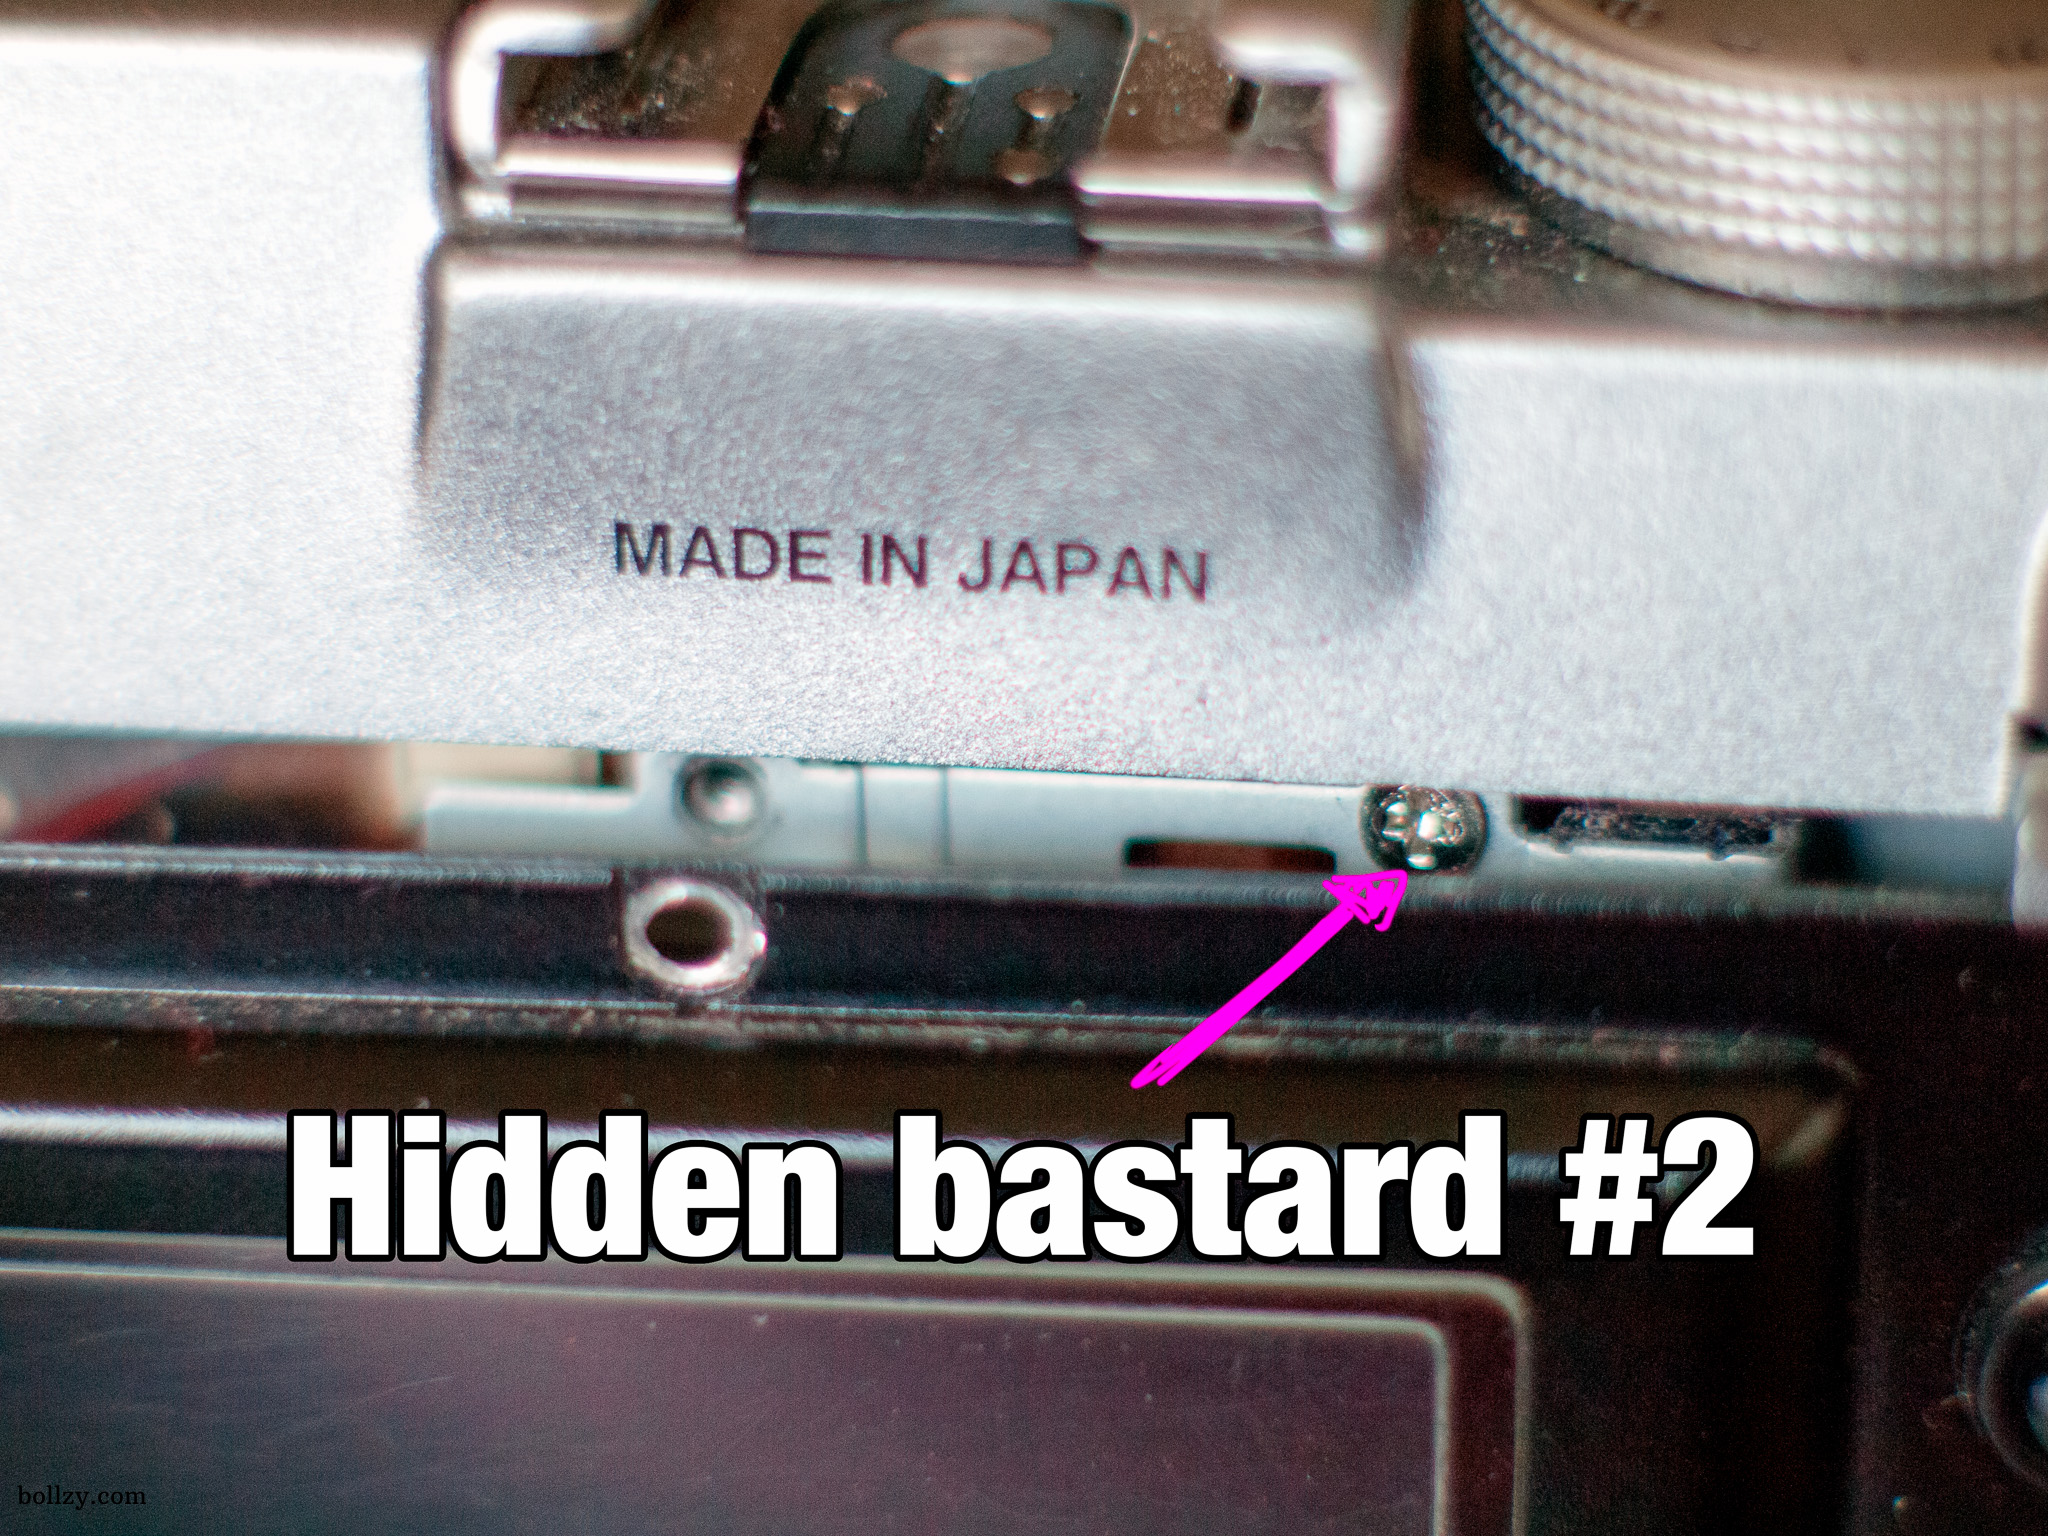
Step 3: Remove all the highlighted screws.

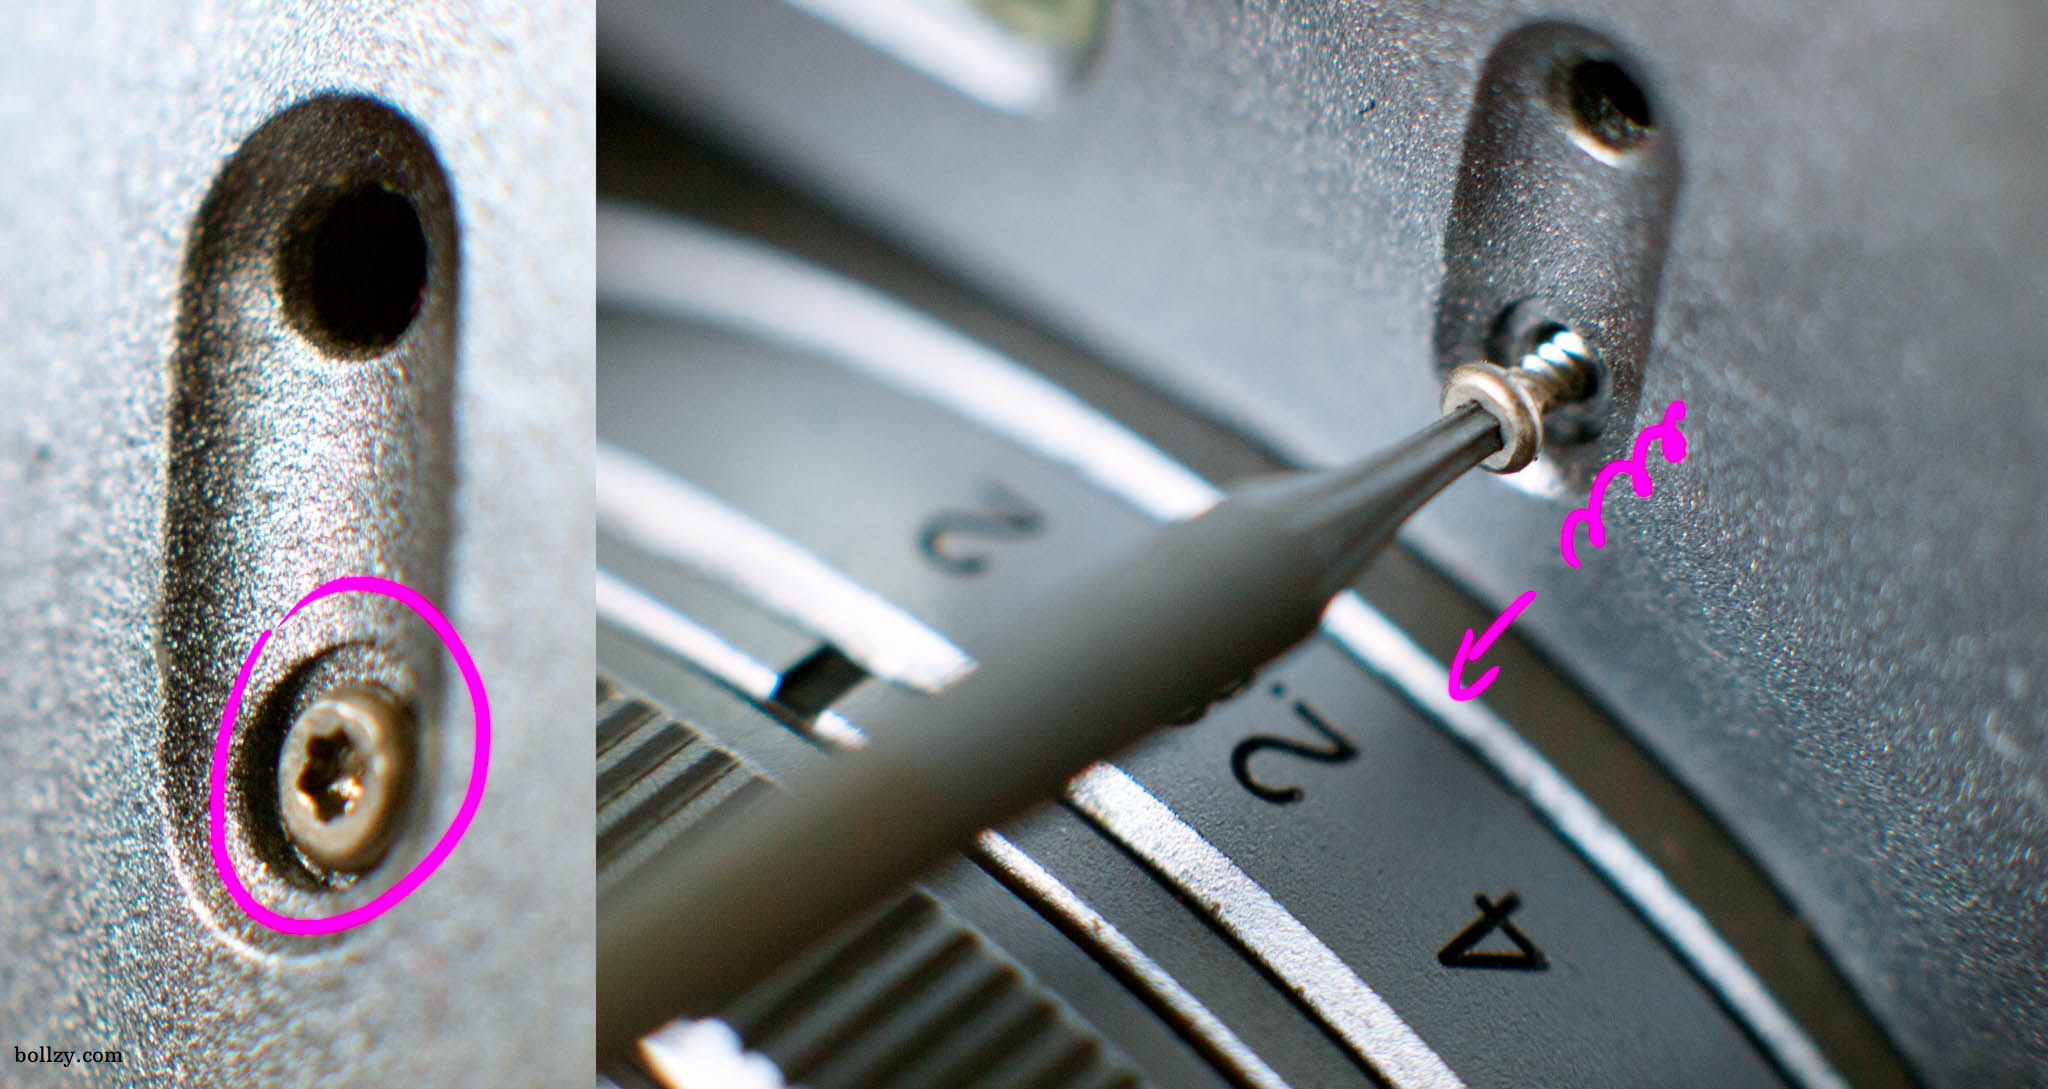
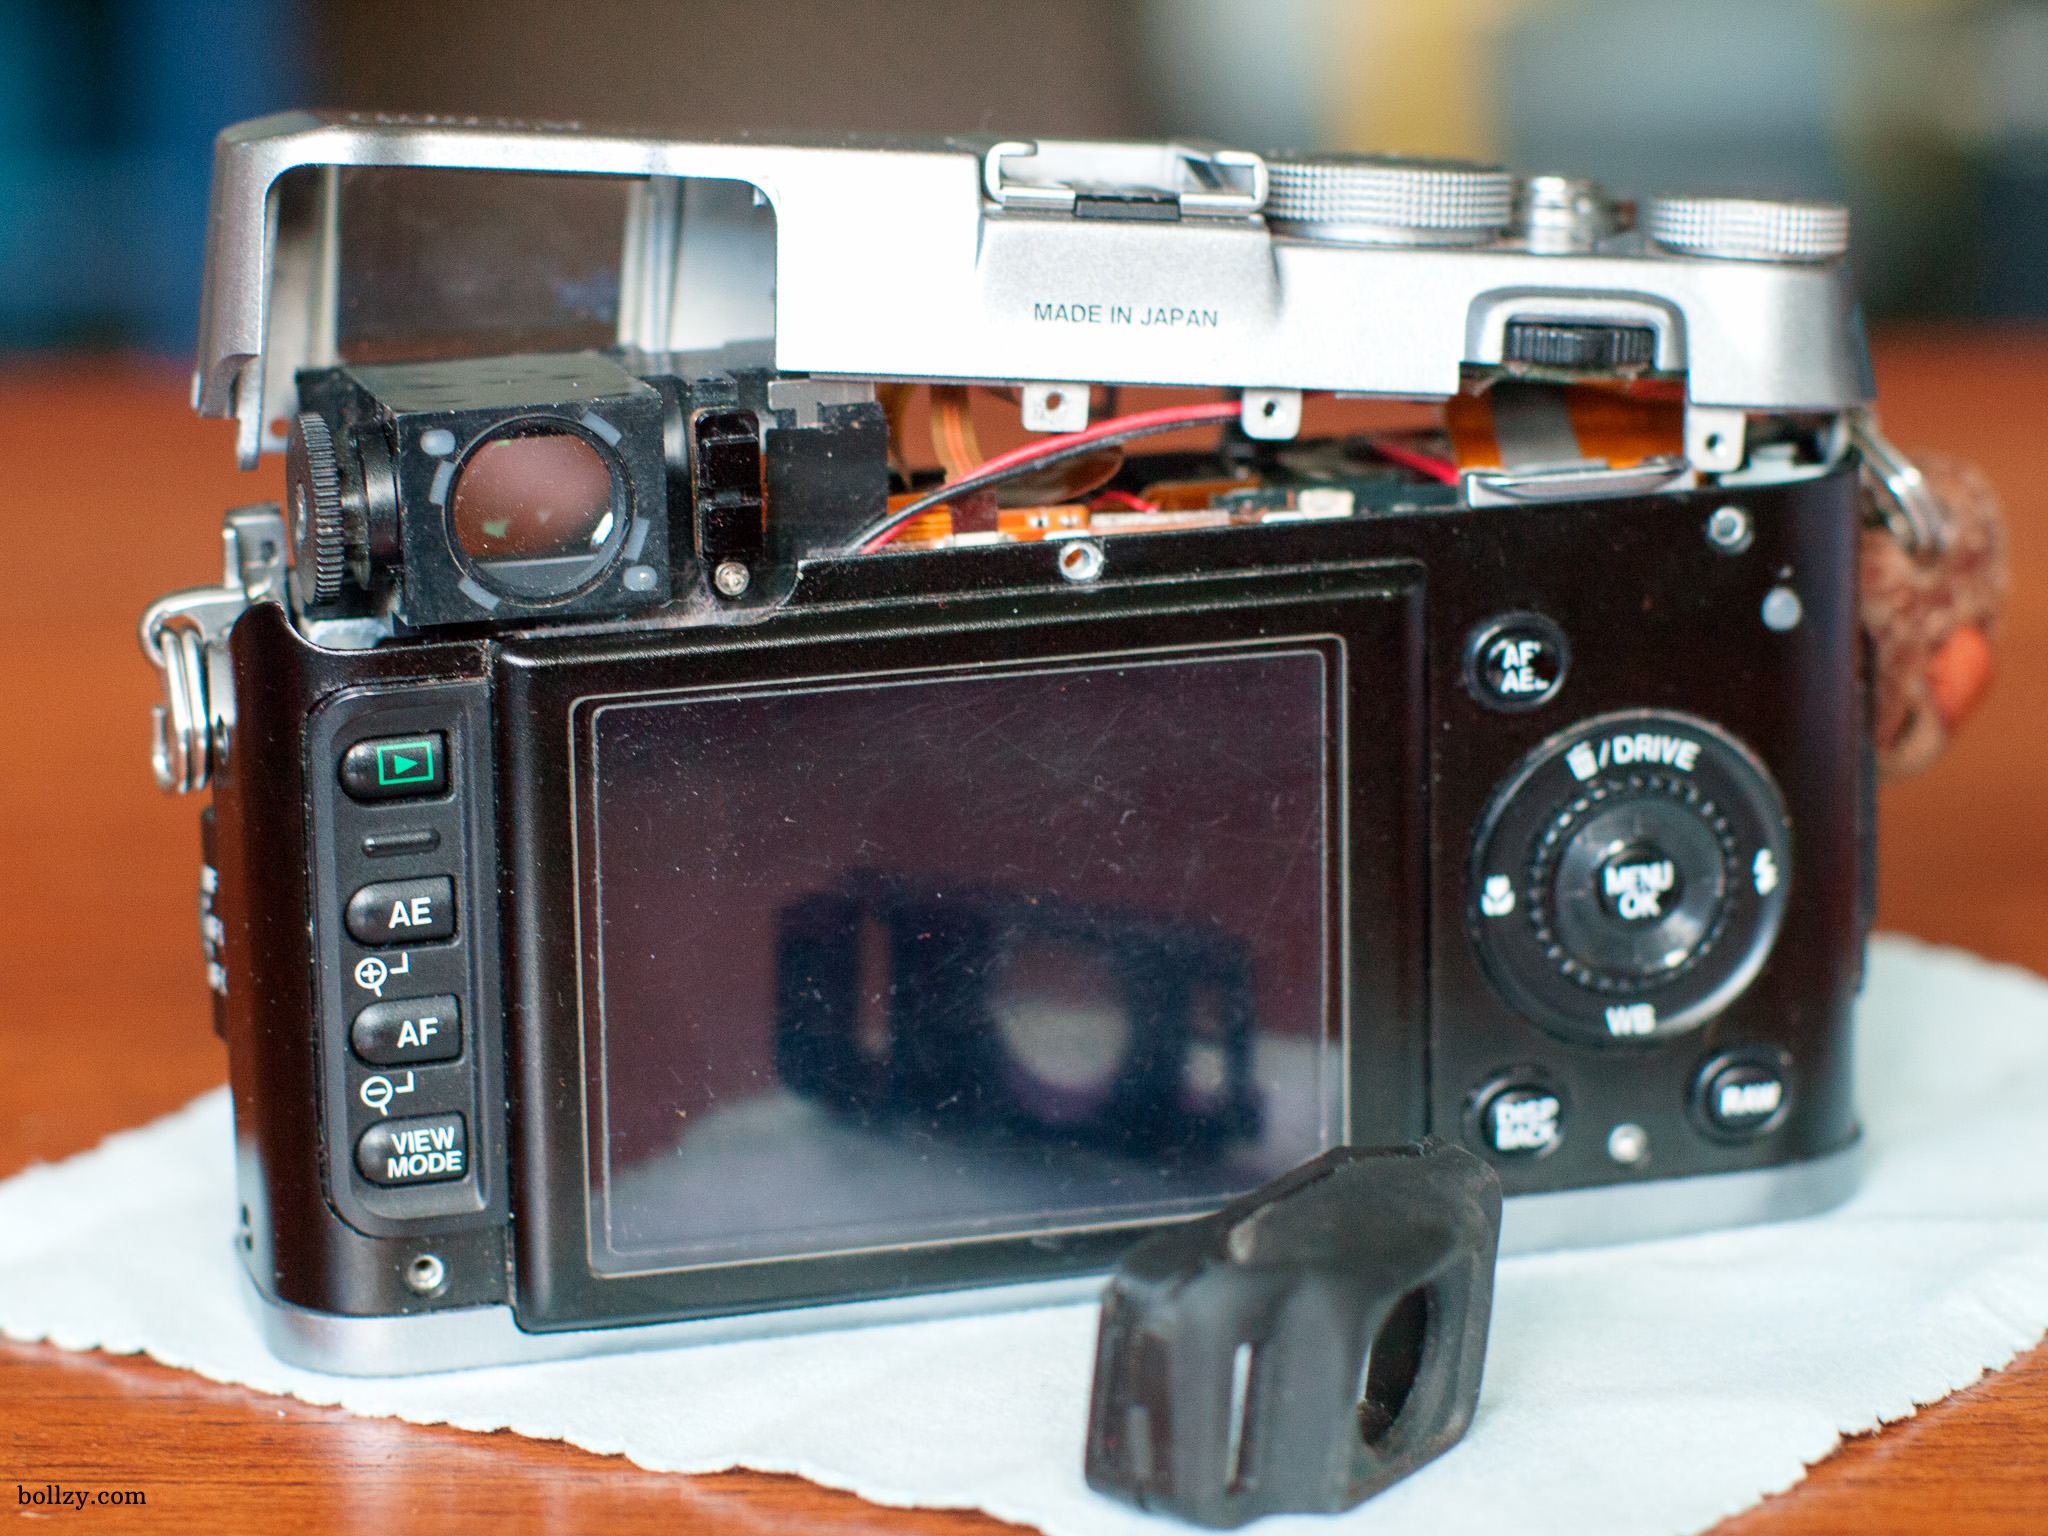
Step 4
Uncap the camera !

Thanks for posting these directions. Were you able to repair the viewfinder curtain? I had this problem once and ended up selling the camera, I didn’t think I would be able to actually reach the curtain.
I’ve never been able to repair that curtain completely, however, the issue doesn’t occur often and is not really annoying.
Thanks for sharing this guide, I’m currently facing the same issue after my x100t fell. Would like to know if there’re any new/reaccuring issue with your vf or camera since you fixed it.
Everything works fine ever since. Except for the curtain which some time suffer from a 1 second lag when closing. But nothing annoying. I would say it still happens 1 in every 500 shots. And the diopter never lived again since I glued it in neutral position.
Thanks Gilles! Now I’m asking fuji if they can perform this fix on my camera (instead of doing it myself) so that the warranty wouldn’t be voided. Hopefully they are open to that idea.
If your camera fell on the ground I doubt they will accept. On my own X100, the price was 700$ to fixe de viewfinder because they had also to replace the whole optical and sensor module which form apparently a solide group with the viewfinder. And I had to pay 80€ just to receive that price quotation.
My local Fuji authorised service already refused to fix one of my camera for an official recall made by Fuji itself because they pretended that the camera fell on the ground which was false and most of all completely unrelated to the problem. I was sending an X10 under warranty for a factory sensor issue.
In fact, when my X100 will die, I will leave that brand because of that authorised service since I have no way to avoid them. FYI, I live in Belgium and the company that manage Fuji repairs in here is called PM2S. The same company also manages other camera brand like Pentax and is established in France, Germany, Netherlands, Spain and Portugal.
My x100 got its viewfinder stuck while I was in India. It has been more than one year and an half than Fujifilm France and other methods (Hint: Shaking or hitting Softly the camera.) never worked.
I slowly stopped using the camera because of the lack of answer on Internet about this issue. (I Originally read that the EVF couldn’t be touched without removing the motherboard.) Yesterday, I googled the problem again and found your website. I can not thank you enough for publishing your feedback and pictures. Now my X100 EVF is fully working again! Thank you!
ps: got some dust on the screen inside the case, I had to take out all remaining screws in the end to fully remove the back panel.
Thanks so much for these detailed instructions Gilles! I was able to fix my stuck viewfinder curtain- it was permanently stuck halfway, a light tap to the shutter was all it needed. I didn’t find any particles obstructing the curtain movement, and it moves fine right now- hopefully it will last. Here are my observations:
Instead of drawing a plan myself, I just printed the picture you took of your plan. ;-)
The screw near the jog switch was fixed pretty good in my camera, so I had to be careful not to strip it.
Hidden Bastard #2 was the toughest to reach, you have to pull the rear casing back a bit to reach it. Be careful when you put it back it, I dropped it inside the camera and had to tilt it back and forth until it fell out.
The leather cover adhesive is pretty gummy and retains its stickiness, and the cover will go back on pretty well if you are careful and avoid peeling it off and on too much. Just be very careful to line up the edges before pressing down to fix it back in place. My cover looks essentially the same as before.
All in all, a relatively simple repair job with these great instructions!!
I have a broken on/off switch and I’m evaluating what it will take to fix it. Could you tell if the shutter/switch assembly was removable from the top plate?
I honestly don’t remember, but I’m pretty sure you won’t be able to understand how to fix it without opening the top plate. The most difficult part of the disassembling is finding a store that sells that tiny T1 Torx screwdriver.
If you try something, please document your reparation and share it with us !
Hi Gilles, I now have a Fuji X100 with stuck diopter. After you remove the top plate, how did you set the diopter in neutral position if the diopter wheel no longer works? Mine is stuck close to neutral, but not quite. I want to set it to neutral, then glue it as well.
I set it to neutral by… shaking the camera and using a toothpick to fine tuning it… Then I had to use my eye to find the neutral spot.
Hello Gilles!
on my x100 the hot shoe fell off. Now I m wondering, if you have acsess to the hot shoe screws if you remove the top plate. can you help me? thanks a lot! best, Nic
Sorry, I don’t remember. I opened that camera two years ago :-/
If you do the operation, please take some picture and publish (or send them here) them so we can continue to document the DYI reparation of X100’s.
I could not repair it. the screws under the hot-shoe are not accessible. some different wires block them. now I m going to buy the x100t .. ;) best, Nic
Hi Nic, Thanks for you feedback !
Did you had the chance to take picture of the operation, especially of the hot-shoe part ?
no I couldnt. it looked exactly like the pictures you ve already posted.
Thank you so much for publishing this guide. The tiny rod that connects the diopter adjustment wheel to the viewfinder broke on my X100S and it’s stuck on an annoying setting. I don’t know if this would be an expensive fix or not and I’m currently waiting for a reply from PM2S. The quote you received for yours doesn’t bode well for me…
In case the repair is too expensive I would like to just move the rod to a neutral position and leave it there. Do you know in which position the diopter adjustment is actually neutral or do I have to do it by trial and error?
Thanks!
You will have to do it by trial and error. It shouldn’t be a problem if you wait a bit for your eye to go back in “neutral position” and do a double check before fixing it. Cheers !
Hi Gilles, I dropped my x100s a few days ago. The screen had horizontal lines and dull colors but it could focus and take 2-3 shots which were saved perfectly on the sd card (no lines at all!!) before freezing (no focus or other operation at all). Even the on off wouldn’t work (at off position the screen was still on! I sent it at a technician and said he should tear the skin (perhaps destroy it!!) and might need a new (to start). Then he said it might be a connector failure (hopefully) or the sensor. Did you manage to glue back the skin as before? Since you have an idea of what it is inside, do you think I could locate a connector failure by myself? Thanks!!
The skin I ordered was already sticky and pre-cut, it was cheap and really well made. I’ve put a link to the manufacturer on this article.
If the failing connection is located on the top plate, you might be able to replug it by yourself I did this operation so long ago I don’t remember how it looked inside.
If it is inside de camera body, you will have to take the risk to continue dismounting your camera. If you do so, please document clearly the process and share it to the world !
Trying by yourself will cost you about 20€ for a new skin (if you already own the tools I have listed). If your camera isn’t under warranty, you should try to find that connector. If you doesn’t feel like dismounting the rest of the camera, remount it and give it to a specialist. Don’t bother about the state of that skin for now.
Hello, did you get your camera fixed?
I’m having the exact same issues.im hoping it’s a disconnected connector haha
A thorough walk through, thanks. My wobbly hotshoes finally fell off and I thought I’d have a go at fixing it myself. It turns out the hot shoe is not accessible. There are a couple of circuit boards inside the top plate which appear to have been assembled and then wires have been soldered in place. Any access to hotshoe would require cutting and resoldering again!
Sadly for me I knackered the EVF in the process. Now I just get a white square when I try to use the electronic view finder. All other functionality seems fine, and I never used the EVF anyway. Its a shame, but I knew the risks. I can still take photos which is the important thing :)
Hello Gilles. Thank you for posting disassembly instructions. Loved the “hidden bastards” description. Question: the shutter button; is it an integrated sub assembly to the top plate? My friend’s x100s shutter button came apart in the following separate parts: inner button, outer button (on/off lever) spring and a spring tab/shaft. Re-assembly I don’t think can be done unless the camera top plate is removed…. Am I correct?
I can’t say for sure but I don’t know how else you can fixe that part.
Please take pictures and document while you are fixing that shutter button so we can continue helping other X100 owners ;)
Thank you for this guide, I went beach camping with my X100 and despite being careful a piece of grit got inside my evf curtain. Once my tools arrived it only took about 15 mins to get it disassembled and cleaned up!
Hello , thanks for sharing your tips , I’ve landed here since searching for some information, I have lost one of the screws on the bottom of the camera body that holds the tripod holding screw thread thing, it has one screw either side of it , but one had shaken loose, and has got only one screw holding it in now … I wonder if you knew what size this screw is so I could buy another one . I could take out the one remaining ( but the large threaded thing may get lost in the camera )
Cheers Tony G – New Zealand
I can’t help you with that, sorry. I don’t have the tools to mesure something that small :-/
I have an x100f
Sorry forgot to mention that but
Great guide, I just asked for repair quote for my stuck viewfinder but if the price is too high (likely), I’ll be doing it myself and re-skinning it with one of those cool colored leather skins. How did you actually “fix” the curtain once inside? Was there dust obstructing it? Slight tap? Were you able to power it up with the top cap off to verify? Thanks.
Sadly I don’t remember how and if I unstuck successfully mine. The camera used in this tutorial has been stolen years ago and my replacement X100 never needed any reparation yet.
Hi, thank you for this guide.
Can you just tell me what you’ve used to stick the covers back ? What kind of glue ?
Best regards
Hi,
Since tearing down the original cover is kind of ruining it,I bought a new cover to replace the original one. There is a link on this guide to buy new covers that are even better than the original one.
As for the answer of your question: The cover is not glued, it is fixed with 3M material (or similar). The exact material reference is unknown.
I’ve used very thin cardboard to make a template, and used an awl to punch small holes in the cardboard. Then, press the screws into the corresponding holes. It holds them tight.
Great tutorial. Thank you very much.
I have a terribly dirty X100F without warranty.
Do you know if it is the same procedure for the “F”?